← The Microphone
The Microphone — Photo 34
What This Image Shows
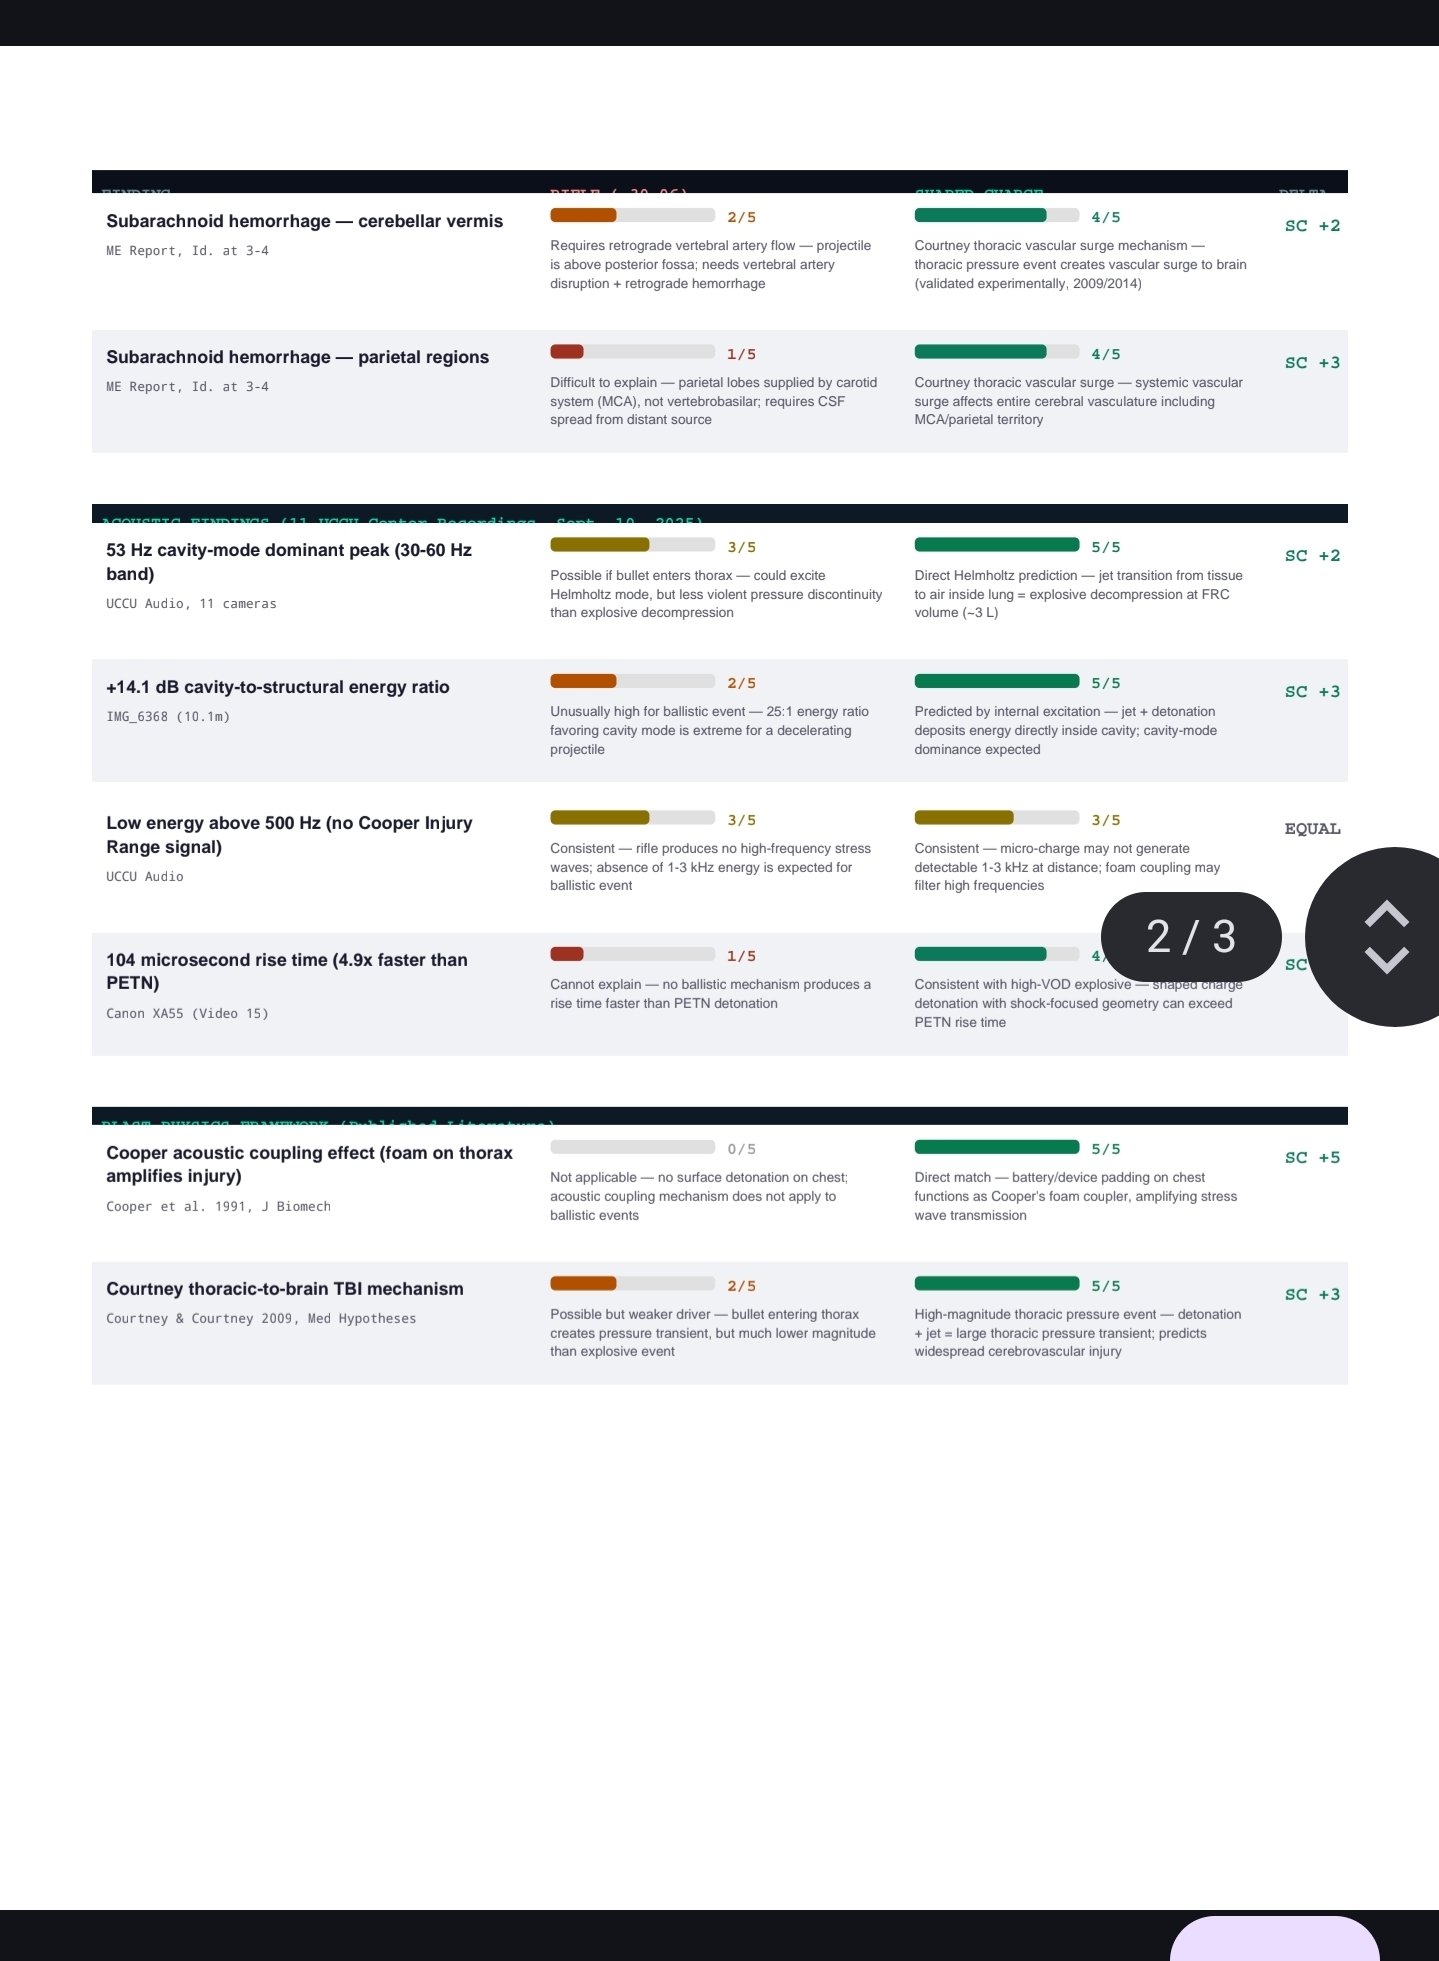
Page 2 of 3 of a forensic hypothesis comparison table scoring each finding against two competing hypotheses, "RIFLE (.30-06)" and "SHAPED CHARGE", on a five-point scale with a delta column. Rows cover subarachnoid haemorrhage in the cerebellar vermis and parietal regions, a 53 Hz cavity-mode dominant peak, a +14.1 dB cavity-to-structural energy ratio, low energy above 500 Hz, a 104 microsecond rise time, the Cooper acoustic coupling effect and the Courtney thoracic-to-brain TBI mechanism. Sources are cited per row.
Where This Image Appears
This image is used on the following investigation pages:
Related Areas
- Cluster: The Microphone
- Section: Microphone — The Exploding Mic Theory
- All photos: Photos
More In This Cluster
- Previous: The Microphone — Photo 33
- Next: The Microphone — Photo 35